As a movie zealot, you must be excited about the fantastic 3D movies like Avatar, Prometheus, Titanic, Pi and other new released 3D movies. Would you like to convert these 3D movies to 2D compatible portable devices so that you can enjoy the movies anywhere you go, or convert your favorite 2D movies to 3D format for playback on the 3D TV for a better visual effect? Tipard 3D Converter for Mac make your dream come true. As the all-in-one video converter, it can easily to convert 3D/2D videos to 3D/2D videos with only one click. Besides, it also works as the video converter for you to get the ideal video effect. The guide mainly introduces you how to use this versatile 3D converter for Mac.
After you launch the program, you'll see the main interface of the program and here please select 2D to 3D conversion mode, and then please click "Add File" button at the bottom of the interface to add 2D videos to the program.
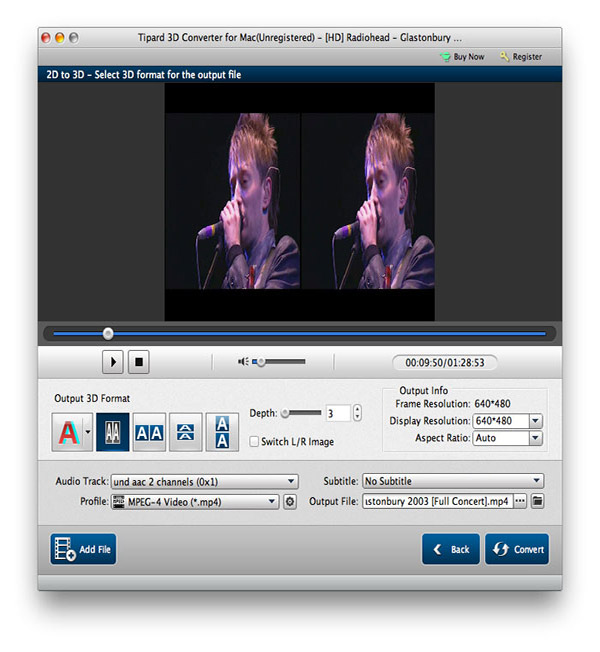
Click the drop-down arrow right besides the "Profile" column, and a drop-down list will pop up, and then select your desired 3D format in the "3D format" list.
With this versatile 3D Converter for Mac, you can choose the output 3D format like Anaglyph 3D, Side by Side (Half-Width) 3D, Side by Side (Full) 3D, Top and Bottom (Half-Height) 3D and Top and Bottom (Full) 3D as you wish. Also, the depth of 3D is adjustable according to your needs.
With all efforts done, you can click "Convert" button to start to convert 2D movies to 3D format. The conversion process will be completed in a short while.
In the main interface, please choose 3D to 3D conversion mode. After that, please click "Add File" button to import 3D videos to the program.
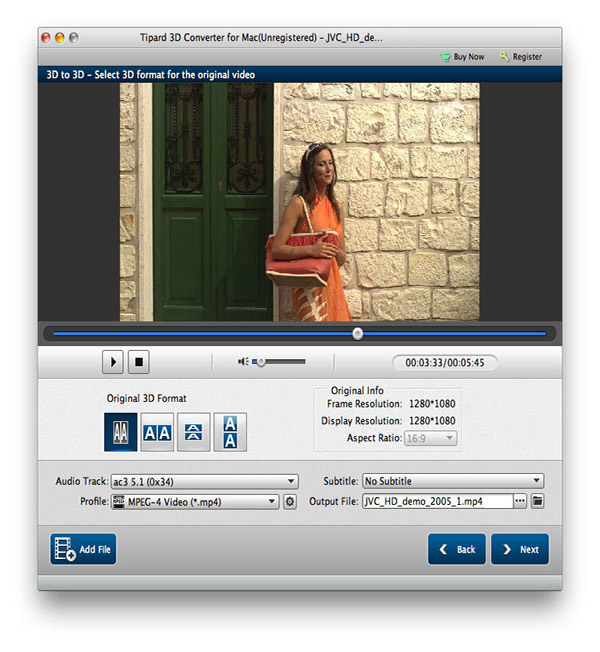
After loading the 3D files, you can click "Profile" drop-down list, and you can see all the profile that this 3D Converter for Mac supports. Please choose "3D format" and then select your needed format in the list.
Here you can customize the output settings for a better video effect. There're four 3D modes available, including Side by Side (Half-Width) 3D, Side by Side (Full) 3D, Top and Bottom (Half-Height) 3D and Top and Bottom (Full) 3D as you like.
Click"Convert" button to start to convert 3D movies to your needed 3D format. The progress bar will show you how much it's completed.
Choose the 3D to 2D conversion mode, and click "Add File" button to import 3D files to the program.

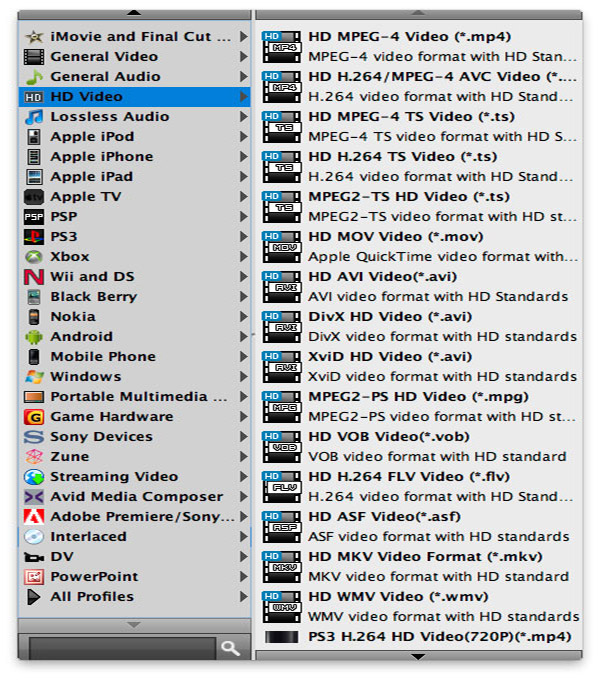
Click the drop-down arrow right beside the "profile" column and you'll see a drop-down list. Please select "General Video" to find your needed video format, or directly input the format in the quick search box, and then choose the one you like.
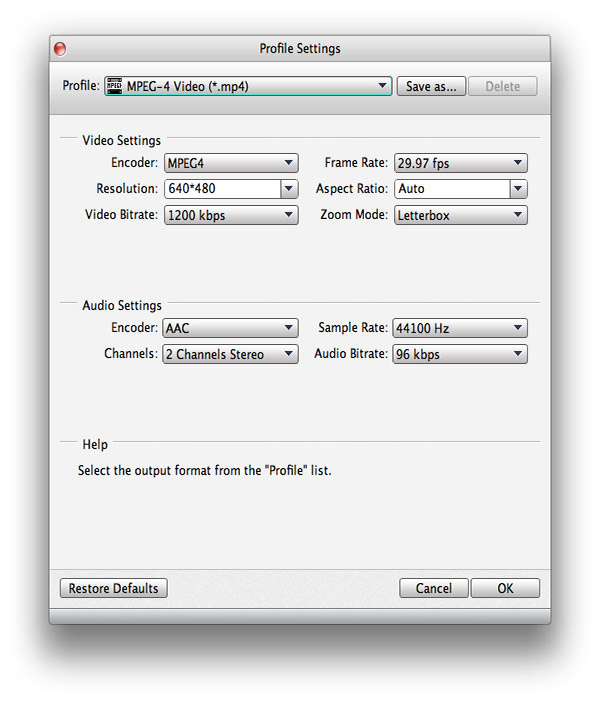
In the "Profile Settings" window, you're capable of adjusting the video and audio settings. For the video settings, you can modify the Encoder, Frame Rate, Resolution, Aspect Ratio, Video Bitrate and Zoom Mode. Also, the audio settings like Encoder, Sample Rate, Channels and Audio Bitrate are adjustable at will.
Not satisfied with the audio track or subtitle? You're free to choose audio track and subtitle if there are any available.
Click "Convert" button to start to convert 3D to 2D format. It 'll take a few seconds to finish the conversion process.

Home | About | Privacy Policy | Terms of Use | Affiliate | Support | Contact Us
Copyright © 2023 Tipard Studio. All Rights Reserved.