Tipard Screen Capture Pro is the best all-in-one video software, which is able to capture on-screen movements, convert videos or audios, create/burn DVD/Blu-ray disc or convert PowerPoint to video or DVD.
How to capture video
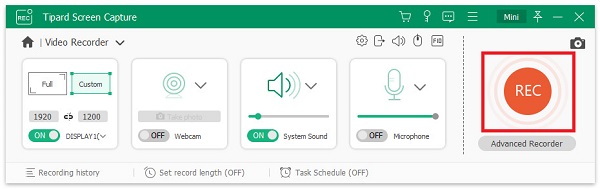
When you want to record video, webcam, game video or other on-screen activities, you are able to set the recording region before capturing your screen.
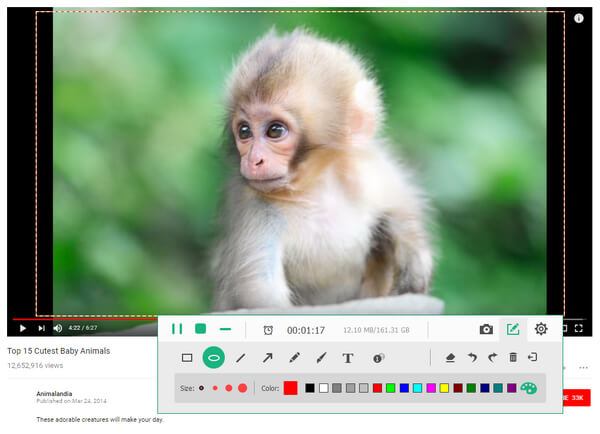
After setting the capture area, you need to decide whether to record video from system audio or from microphone. After that, click "Rec" button and be ready to capture video.
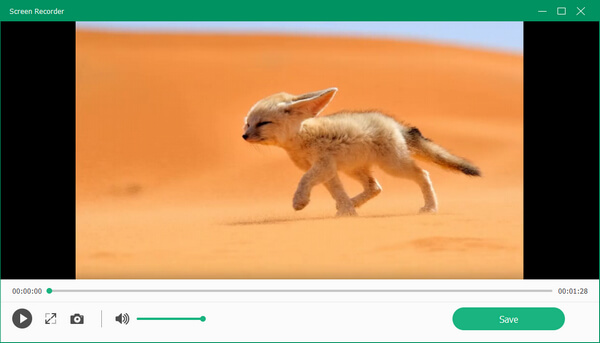
When you finish capturing video, click the "Stop" button and then preview your recording.
How to record audio
Screen Capture also allows you to record audio files. Before you grab the audio, you need to decide to record audio from system voice or from microphone.
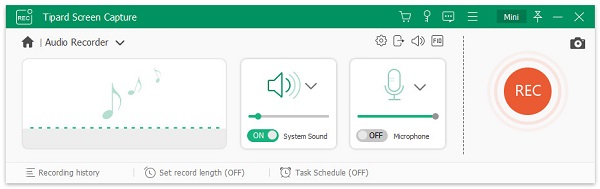
Click the "Rec" button and begin to record the audio files.
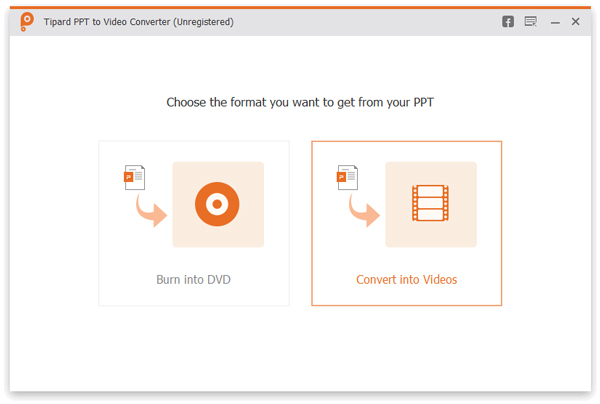
How to convert PowerPoint to video
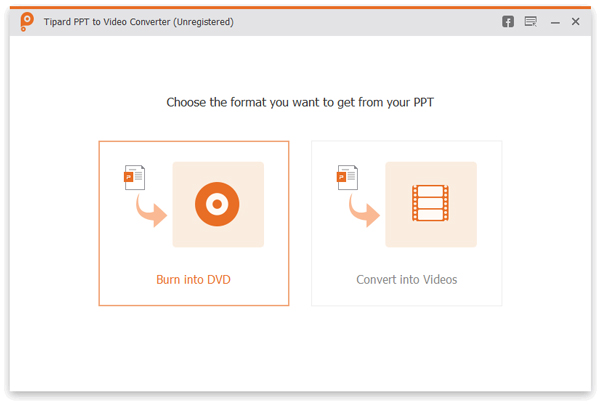
Choose "PPT Converter Pro" and launch PowerPoint to Video Converter. Select "Burn into Videos" option.
Click "Add PPT File(s)" button and import PowerPoint file. This program enables you to input one or more PPT files.
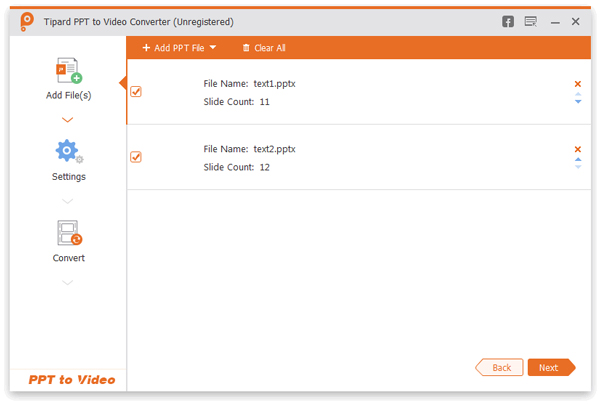
Here are video settings for you to choose from.
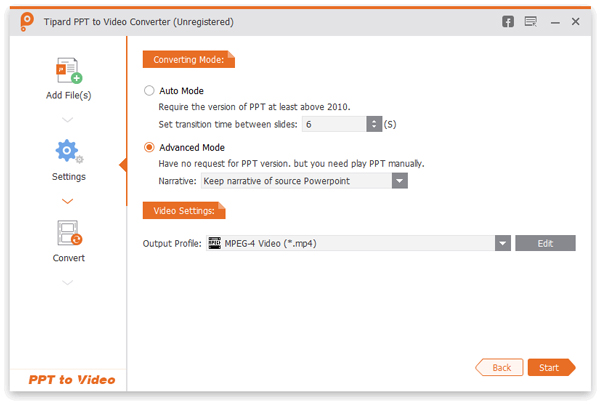
Converting mode
Auto Mode:
"Auto Mode" option needs you to make sure your PowerPoint version should be at least above 2010. Then you can let your PowerPoint slides be automatically converted by setting a transition time.
Advanced Mode:
"Advanced Mode" lets you keep/ignore/record narrative for your PowerPoint slides. Any version of PowerPoint is allowed. Different with "Auto mode", this option needs you perform PowePoint files manually.
Video Settings:
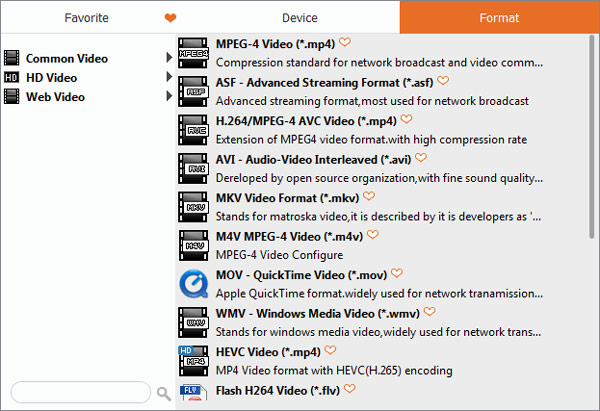
From video settings, you are able to choose your preferred output format like MP4, AVI, MOV and more. Also, you can optionally choose the formats classified by "Device" or "Format". Hit the "Heart" icon and make the format as your "Favorite" one.
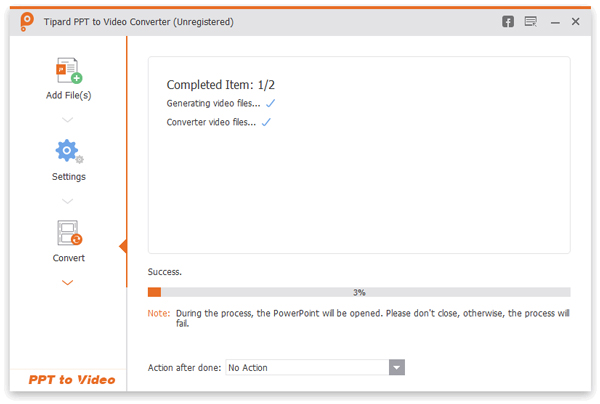
All settings prepared, you are able to click "Start" and convert the PowerPoint slides to video right now. After that, the video will pop up and you can check it.
How to convert PowerPoint to DVD disc/ISO file
Choose "Burn into DVD" option and launch PowerPoint to DVD Converter.
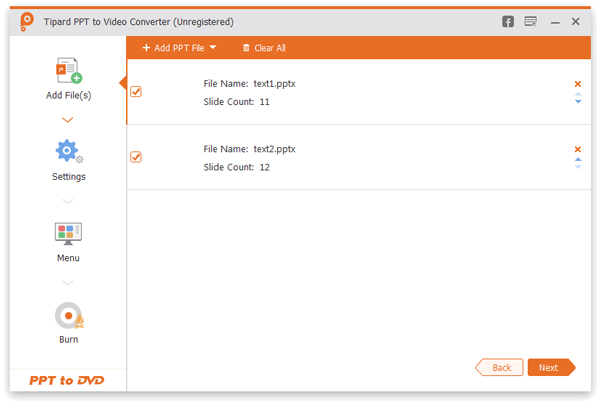
Click the "Add PPT File(s)" button and input one or more PowerPoint documents.
When you are ready to make your PPT presentation into DVD, you need to personalize some DVD settings.

Converting mode:
Make manual or auto settings for your PowerPoint files.
DVD Settings:
DVD Settings enables you to set TV standard and aspect ratio.
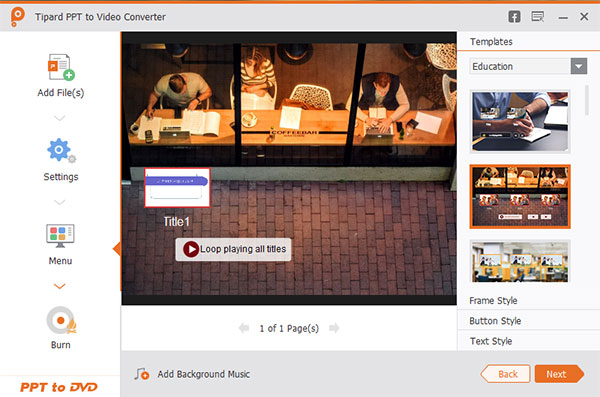
Menu: Here are some templates background images options for you to choose form. You can add background music for PowerPoint document as well.
Finally, click "Start" and convert your PowerPoint to DVD/ISO.

Click "Add file(s)" button and import your video or audio files.
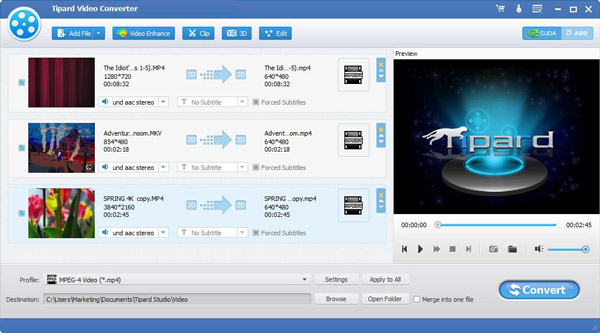
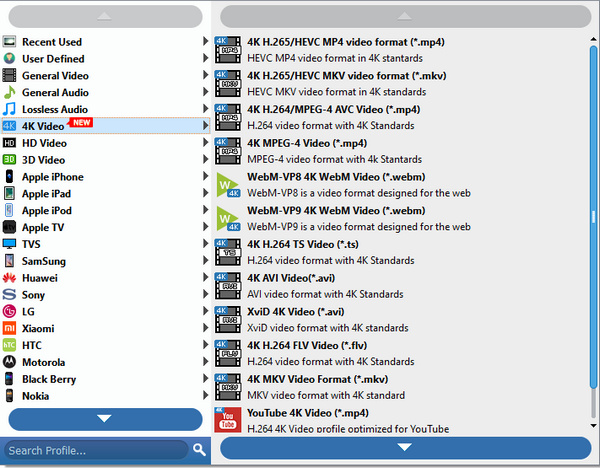
Click "Profile" option and then choose your preferred video or audio format from the drop-down list.
Click "Convert" button and begin converting videos or audios.
Launch DVD creator and insert one blank DVD disc.
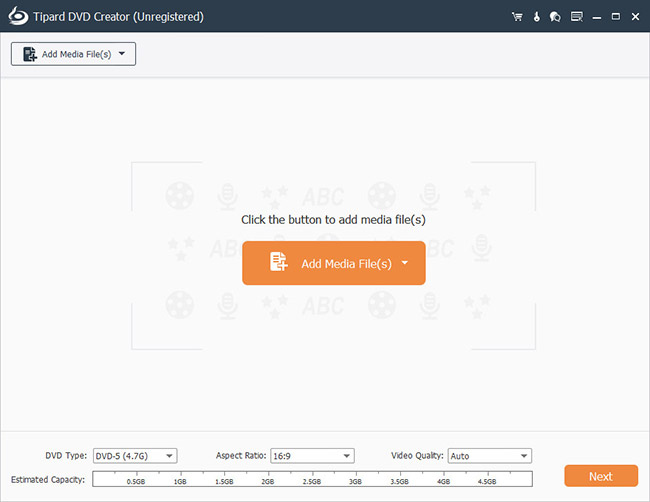
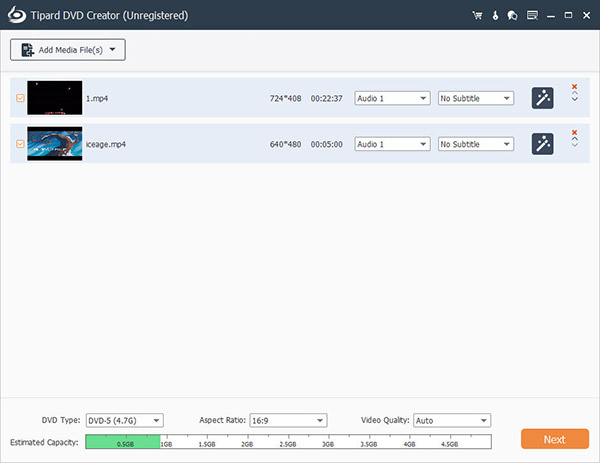
Click the "Plus" button and then import one or more video files.
Click the "Destination" and then choose to convert video to blank DVD disc or save it as an ISO file.

Click "Actions" > "Edit Menu" and come to the pop-up window of "Edit Menu". Here you can customize menu, frame, button and text. After editing, click "Save" and close the window.

Highlight the video file and click "Edit" button, and you will be let to the video edit window. Adjust the parameter settings, trim the video length, crop the video and add watermarks as you like.

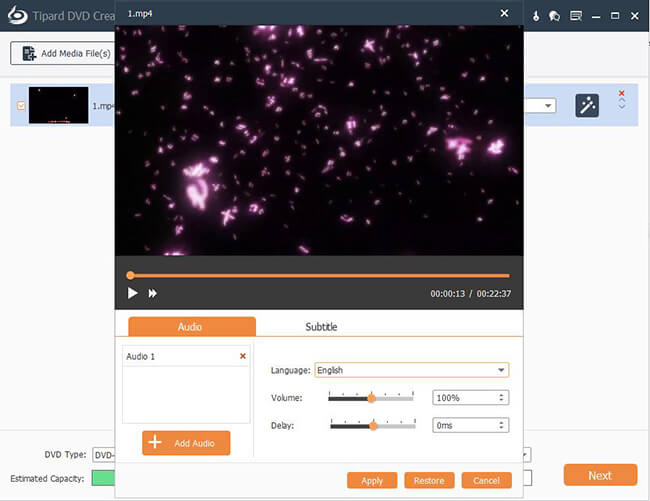
Select the "ABC" button and you will enter the "Edit Audio/Subtitle" window. Adjust the parameter settings, trim the video length, crop the video and add watermarks as you like.
Finally, click the "Burn" button and then create your DVD.


Home | About | Privacy Policy | Terms of Use | Affiliate | Support | Contact Us
Copyright © 2023 Tipard Studio. All Rights Reserved.